

If you’ve used Google Docs for school or writing blog posts, you know it’s versatile, intuitive, and free to use.
So, while it may not be the first word-processing tool you think of for writing books, there are plenty of reasons why it should be one of your top three.
After looking through this post, it might even become your number-one option.
This guide will get you from a blank page (or blog post) to a finished book, with simple step-by-step instructions and screenshots that show you exactly what to do.
- Is Google Docs a Good Place to Write a Book?
- How to Write a Book in Google Docs: 9 Easy Steps
- Step 1: Break Up Your Outline
- Step 2: Set and Update Your Styles
- Step 3: Add Supporting Body Text
- Step 4: Insert Images and Other Visuals
- Step 5: Create Front and Back Matter Pages
- Step 6: Insert a Table of Contents
- Step 7: Download Your Book
- Step 8: Make a Print Copy
- Step 9: Add Page Numbers and Modify your TOC.
- Conclusion
Is Google Docs a Good Place to Write a Book?
The short answer: Yes. It can be — if you know how to use it.
If you’re asking, “Why use Google Docs when there’s Microsoft Word, Scrivener, etc.?” consider the following perks of using Google’s cloud-based word processing program:
- Cloud-based means you can access it on all internet-ready devices, using the app.
- Google makes collaboration easy with the “Share” feature.
- Draftback saves every change you make and can record and replay your work.
- Voice Typing lets you write your book using your voice instead of your fingers.
- You can convert your book to a Word document download for formatting, etc.
- You can also download your book as a PDF to share it with beta readers.
- It’s FREE to use — no up-front cost and no need for an annual subscription.
As you’ll see in the steps that follow, Google Docs has all the tools you need to create, format, and self-edit your manuscript.
From there, it’s just a matter of downloading it in the form you need for professional editing, interior book design, and publication.
Related: 101 Hobbies for Characters in Your Book
How to Write a Book in Google Docs: 9 Easy Steps
Writing a book in Google Docs will take longer than writing a blog post — mainly because it involves a LOT more writing and a few tricks you may yet be unaware of. We’ll start with a titled outline for your book in a Google Doc (using a numbered list) and go from there.
Step 1: Break Up Your Outline
To insert page breaks, position your cursor where you want the break and either go to the “Insert” menu and select “Break” and then “Page Break,” or hit Ctrl+Enter.

Continue breaking up your outline with page breaks until you have a separate page for each of your chapters and for your book’s title (i.e., your title page).

Knowing how to use page breaks will come in handy when it’s time to add other pages at the front and back of your book.
Step 2: Set and Update Your Styles
Now that you’ve got the beginnings of your book template, it’s time to set the styles for your book’s title, chapter headings, and body text.
Start with the Chapter 1 page, select the title, and choose the “Heading 1” style from the style menu. Once you apply the H1 style, you can then modify the text to make it look just the way you want.

Center your chapter title using the alignment tool on the toolbar.

Then choose your fonts, font size, and line-spacing for the Heading 1 (H1) style, which you’ll use for Chapter titles and other page titles in your book.


Once you’ve got your heading looking the way you want it, select the text and go back to the style menu to update the Heading 1 Style with your new formatting.

Do the same for each of your subheadings (subtopics), this time applying the Heading 2 or Heading 3 style. Once you’ve set the font, size, and spacing, go back to the style menu and update your chosen heading style.

Choose from left, right, center, or justified alignment for body text and headlines by selecting the text, going to the top ribbon menu, and selecting the alignment you want.

If your chosen alignment isn’t the default for body text, you can go into the style menu and update the style for “Normal Text” (or for the particular heading style you want to change).

As for margins (top, bottom, left, and right), Google Docs sets those at one inch (1”) all around by default, but you can change that in the Page Setup (under the File menu).


You can also change the page size, though Google Docs doesn’t offer custom sizing.

If none of the sizes offered are what you have in mind for your book, select the one that comes closest. You can always change the page size (in Word) after downloading your book as a Word document.
Step 3: Add Supporting Body Text
Now that your subheadings are in place and properly formatted (with fonts, sizes, and line-spacing), you have writing prompts on every page to get your mind working and the words flowing.

This step will take the most time, unless you already have your content ready to copy (say, from your own blog posts) and paste into your document.
Step 4: Insert Images and Other Visuals
First thing you’ll want to do is position your cursor where you want your inserted visual to appear. Then go to the “Insert” menu, select “Image” and then “Upload from Computer,” if you have the visual saved to your drive, or find your image with an internet search or by accessing Google Drive or Google Photos. You can even use your device’s camera.


Note: Only images that are labeled for commercial reuse and modification will appear in the image search results.

Once you insert your chosen visuals, you can use the image tools to resize each one. Each visual’s alignment depends on the position of your cursor, but you can change that by selecting it and using the alignment tool.
Step 5: Create Front and Back Matter Pages
The very first page of your document should have your book title. Add your subheading (if you have one) and your author name to that, center the whole, and modify your fonts, font-sizes, and spacing to create your title page.

After that comes your copyright page, which will use a smaller version of your normal body text — centered and near the bottom of your page.

Add an Introduction (typical for a nonfiction book) by positioning your cursor at the beginning of your Chapter 1 heading, hitting Ctrl-Enter (or going to the “Insert” menu and then to “Break→ Page Break”) to add a page before it.
Go to the top of this new page and add the word “Introduction.” Then select it and apply the Heading 1 style to it, so its formatting will match that of the Chapter titles.
After a carriage return, add the text for your Introduction.

The end pages of your book will likely include the following:
- Conclusion (wrapping things up)
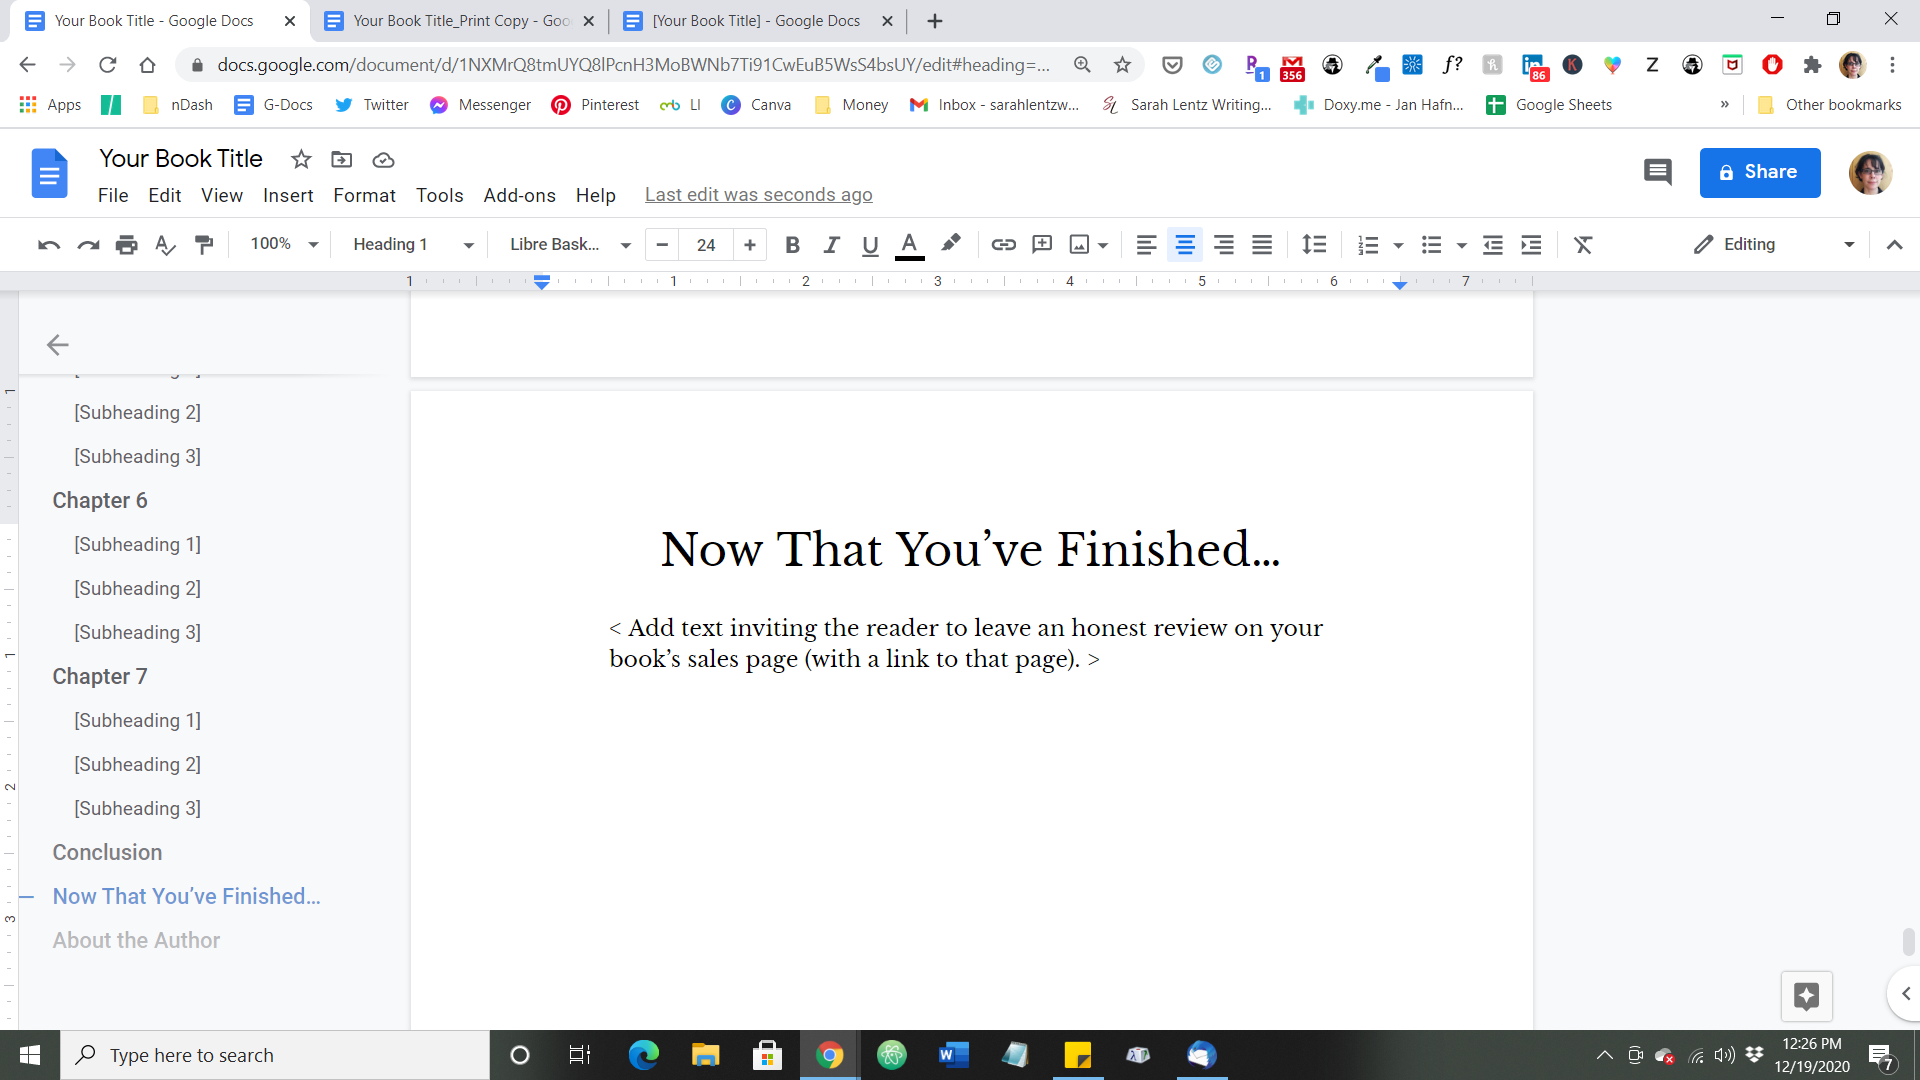
- “Thank you” page (with a review request)
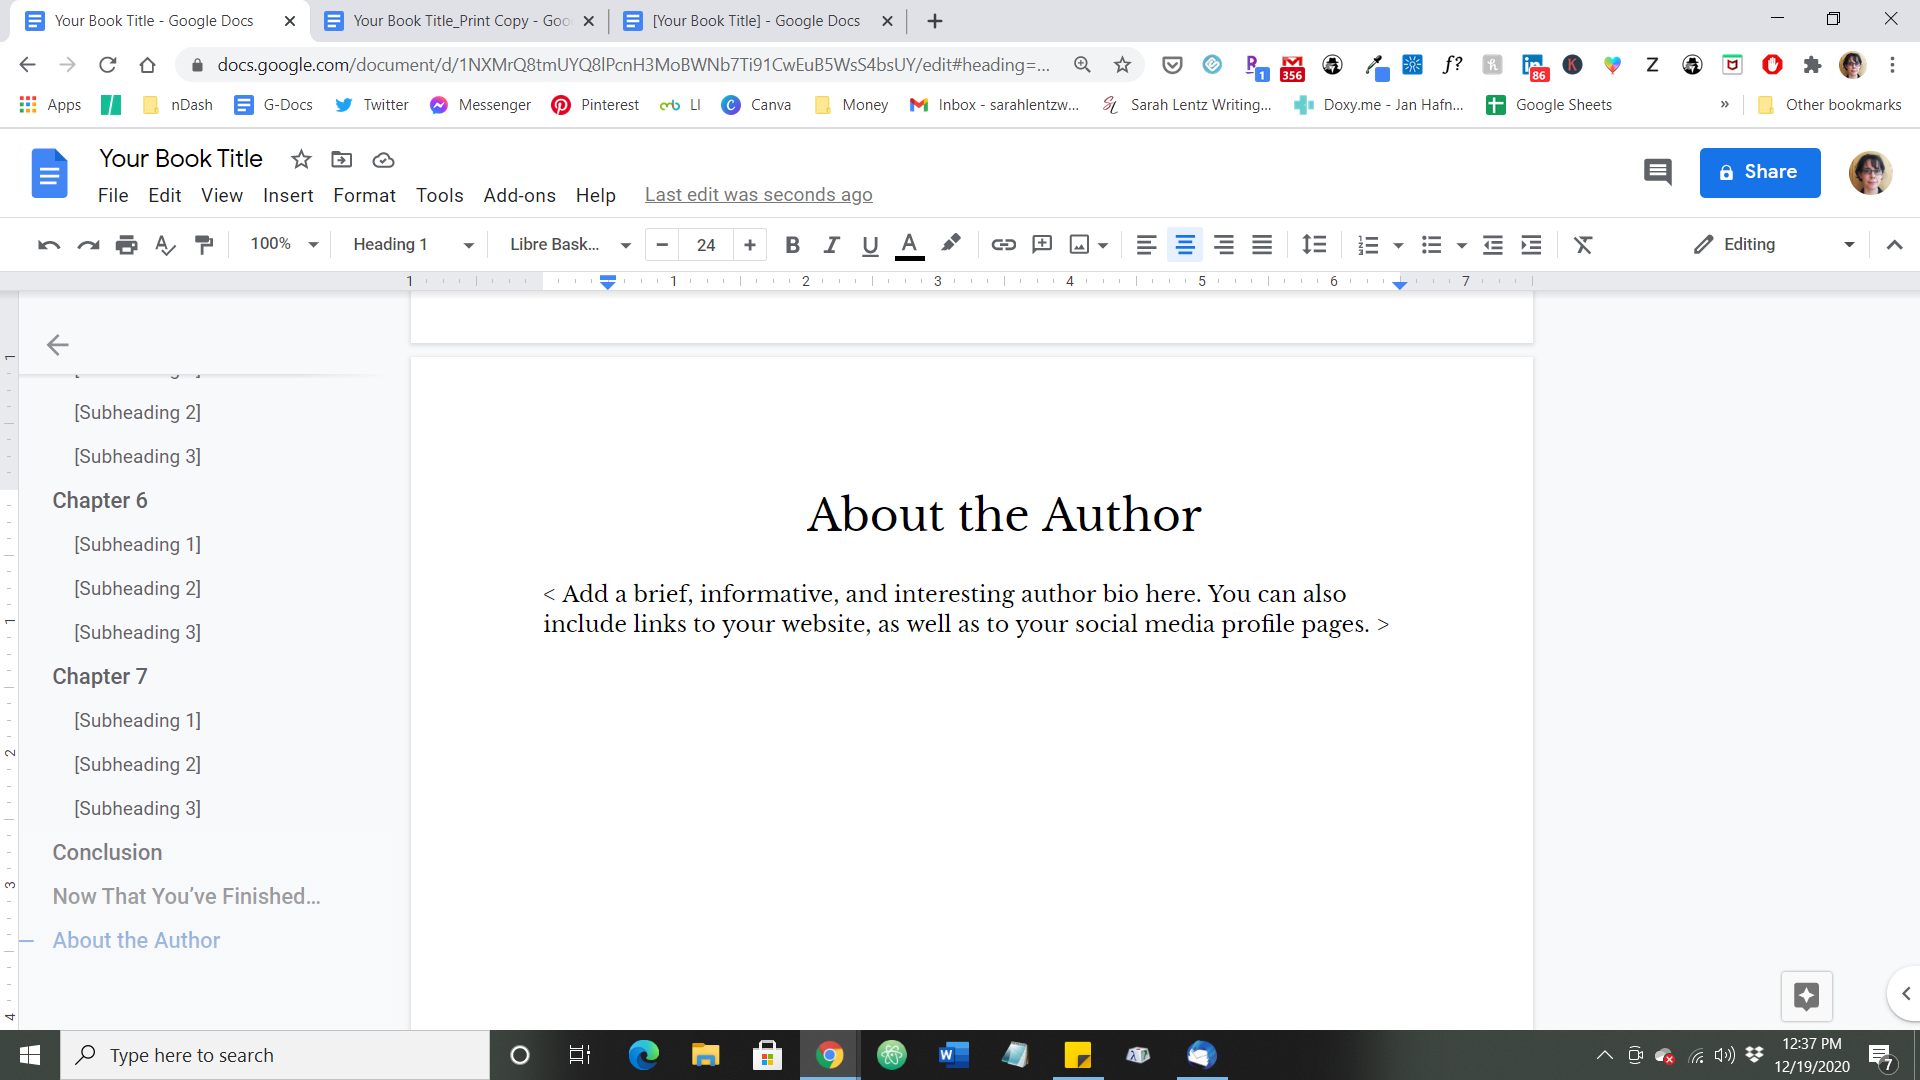
- About the Author page
- Other Books by Author page (optional)
- Appendices, Index, and/or Glossary (optional)
Go to the end of your book and add a new page by inserting a page break. Then title your new page as “Conclusion,” “Now that you’re finished…(or “Thank you”),” “About the Author,” etc. Select your page titles and apply the Heading 1 style to each of them.

Step 6: Insert a Table of Contents
Once you’ve written the body of your book — with all your chapter titles and subheadings in place, as well as all your other pages — it’s time to create a Table of Contents (TOC).
Between your copyright page and the first page of Chapter One, insert a break for a new page with the words “Table of Contents” (or “Contents”) set in Heading 1 style at the top.
Once your page title is all set, go to the “Insert” menu again and scroll down to the bottom to find “Table of Contents.” From there, you’ll choose the second of two options — the hyperlinked TOC, without numbers (for an eBook).

Step 7: Download Your Book
While you can simply share your finished book with an editor using the “Share” function and send it to their email address, if they prefer working with Word documents, you can download your book in Word format.

You can also download your finished book as a PDF to share with beta readers or to upload to your publisher’s website. Simply choose PDF from the download options and click on the download to open it in your browser.

Step 8: Make a Print Copy
Go into the “File” menu and “Make a copy” of your document. Title this new copy as your “Print Edition.”
Step 9: Add Page Numbers and Modify your TOC.
Make a copy of your finished eBook and rename it as your “Print” copy. Now, you can add page numbers and modify your Table of Contents to include them.


Make sure you set your starting number at zero (0) if you’re skipping the first page (title page) and you want the first appearing page number to be one (1).
To make your page numbers appear in opposite corners for a two-page spread, go to Headers & Footers in the “Format” menu and make sure there’s a check-mark in the “Different odd and even” option (as well as the “Different first page”).
You’ll have to add page numbering to both the “Odd Page Footer” and “Even Page Footer,” making sure you keep the first page (title page) number-free and keep the starting number at zero (0).

Wherever your cursor happens to be in your document, Google Docs will set page numbering for the entire book, so the “Different first page” is always the title page.
Note: At the time of this writing, the page numbering function only accepts Arabic numerals for page numbering. If you want Roman numerals for pages between the title page and the first page of Chapter 1, you’ll need to download your book as a Word document and modify page numbering there.
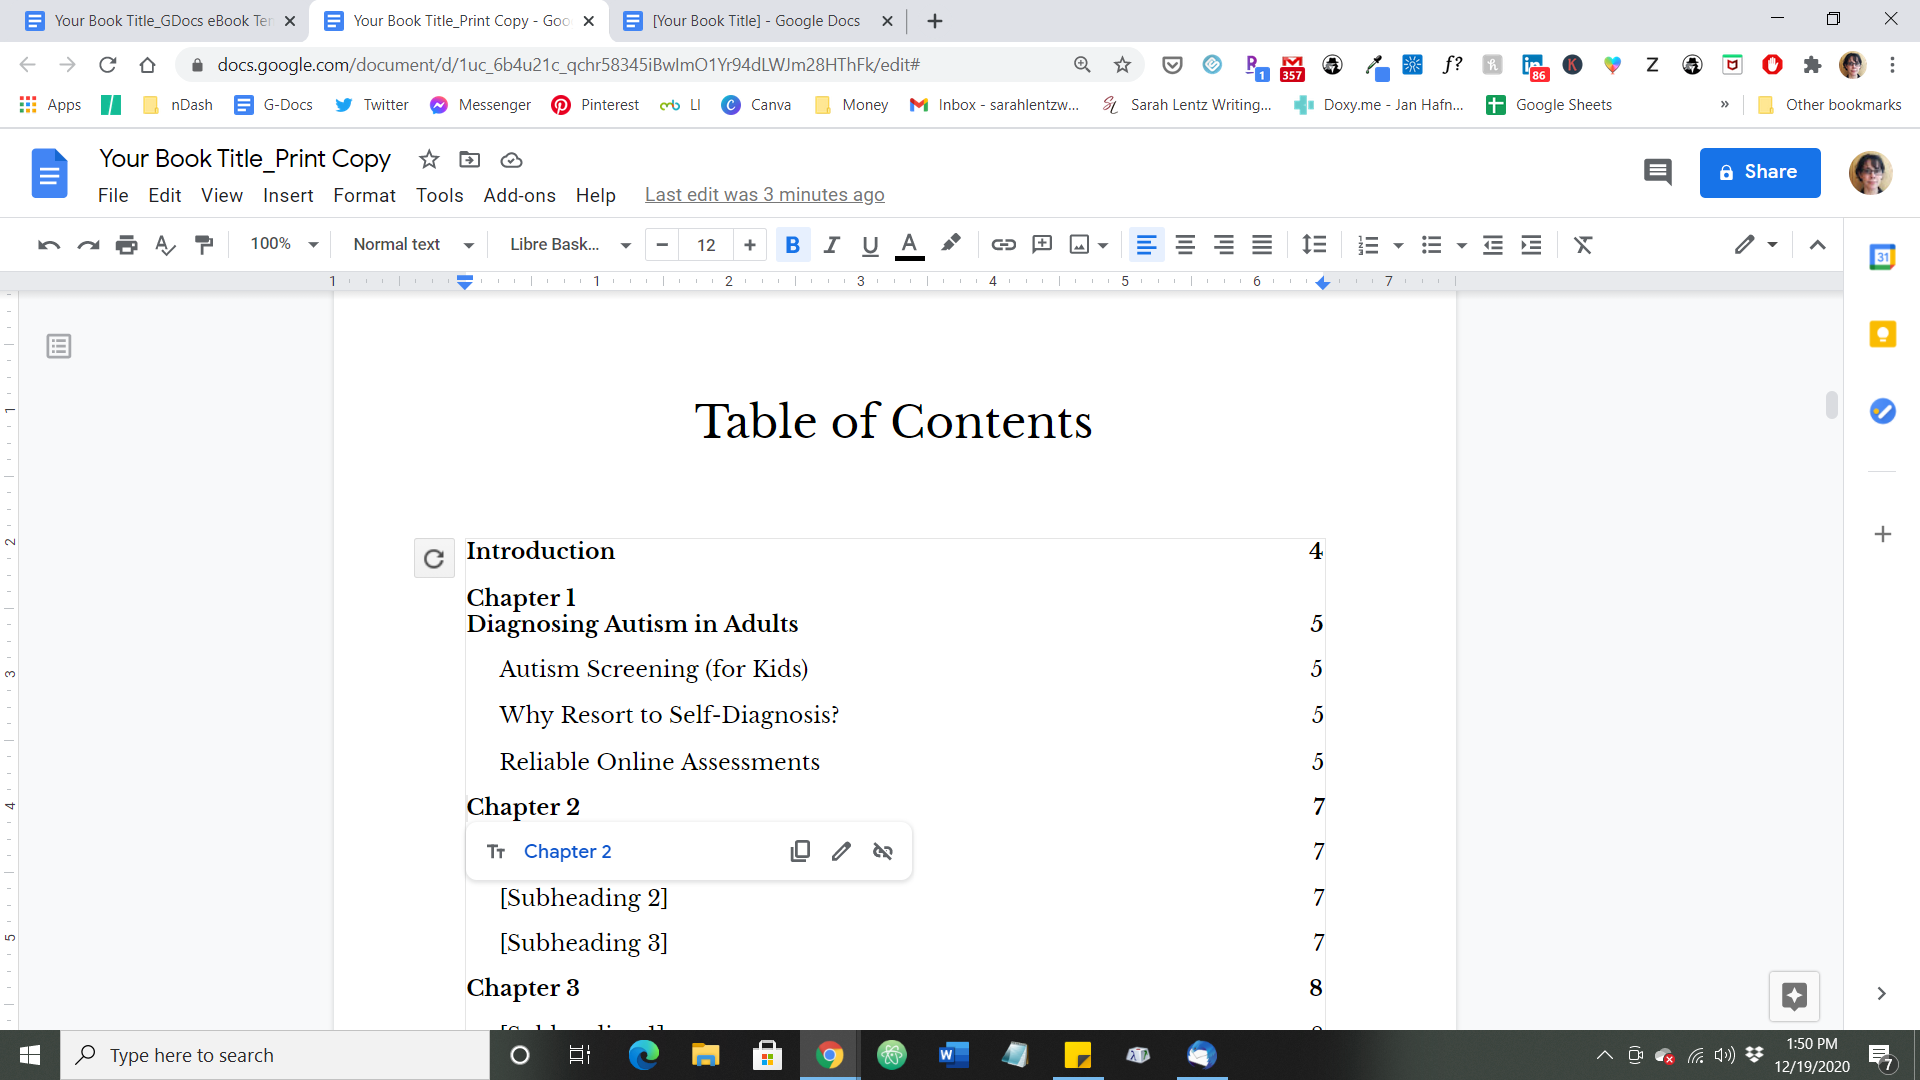
Once you’ve got your page numbers in place, you can delete your hyperlinked Table of Contents and insert one with page numbers (and hyperlinks, which will work in the PDF).
More Related Articles
33 Poetry Publishers Who Can Publish Your Poetry Book
16 Best Self-Publishing Companies For Your Writing Business
List Of Standard Books Sizes To Make The Right Size Selection
Conclusion
At the very least, now, you know how to create book template Google Docs of your very own. From there, it’s just a matter of swapping out the placeholder text for your own content.
The question remains: How soon will you get started on your first book in Google Docs?
You decide what you do with it — whether you give it away as a gift, offer it as a free download from your website, or publish it with an online bookseller.
How will you make the most of your newest book idea?